Tencent Cloud Launches One-Click Clawdbot Deployment Guide
January 26, 2026 — Clawdbot, a powerful AI Agent, has surged across global tech communities and social platforms—sparking widespread discussion and adoption.
Source: docs.clawd.bot
While not the first “task-performing” AI Agent on the market, Clawdbot reignited developer enthusiasm just weeks after the release of Claude Cowork—thanks to its uniquely human-centric design and fully autonomous execution model:
- Personal Environment Execution: Runs natively on local machines or private servers—ensuring full data ownership and privacy.
- Natural, Chat-First Interaction: Integrates seamlessly with popular messaging platforms (e.g., Slack, Discord, Telegram), enabling intuitive, conversational control—just like texting a friend.
- Full Permissions & Persistent Memory: A truly personal AI assistant—capable of file I/O, long-term context retention, and self-improving behavior—without routing sensitive data through corporate APIs.
⚠️ Note: Clawdbot currently prioritizes overseas social platforms. Domestic users may require proxy or regional configuration adjustments.
Where Should You Run Clawdbot?
As Clawdbot’s popularity grows, deployment environment selection becomes critical—especially for security-conscious users.
Community best practices strongly recommend isolating Clawdbot from primary workstations. Two robust, production-ready options stand out:
- ✅ macOS Devices: Offers the most mature native support.
- ✅ Cloud Linux Servers: Provides strongest isolation, 24/7 uptime, and zero local resource consumption.
💡 Windows support remains experimental—avoid for initial deployment.
Why Tencent Cloud Lighthouse?
Compared to procuring and maintaining physical hardware—with associated upfront costs, setup time, and ongoing electricity fees—cloud infrastructure delivers unmatched speed and cost efficiency.
Tencent Cloud’s Lighthouse is purpose-built for lightweight, high-value applications like Clawdbot:
- 🚀 Pre-configured & Ready-to-Run: No manual dependency installs or environment tuning.
- 💰 High Value-to-Performance Ratio: Optimized pricing—starting at just $40/month.
- 🛠️ Zero-Maintenance Operation: Fully managed OS, automatic updates, and integrated monitoring.
Most importantly: Lighthouse now hosts an official Clawdbot Application Template, preloading all required dependencies—including runtime, models, and CLI tooling—for true one-click, sub-second deployment.
Let’s walk through it step-by-step 👇
Step-by-Step Deployment Guide
✅ Step 1: Provision Your Clawdbot Server
You have two flexible paths—whether you’re starting fresh or repurposing existing infrastructure.
Option A: New Lighthouse Instance
- Navigate to the Lighthouse Purchase Page.
- Configure your instance as follows:
- Image: Select Application Templates → AI Agents → Clawdbot
- Region: Choose Silicon Valley, Northern Virginia, or Singapore (optimal for overseas LLM & API latency)
- Instance Type: Minimum 2 vCPU / 2 GB RAM (RuiChi Series recommended)
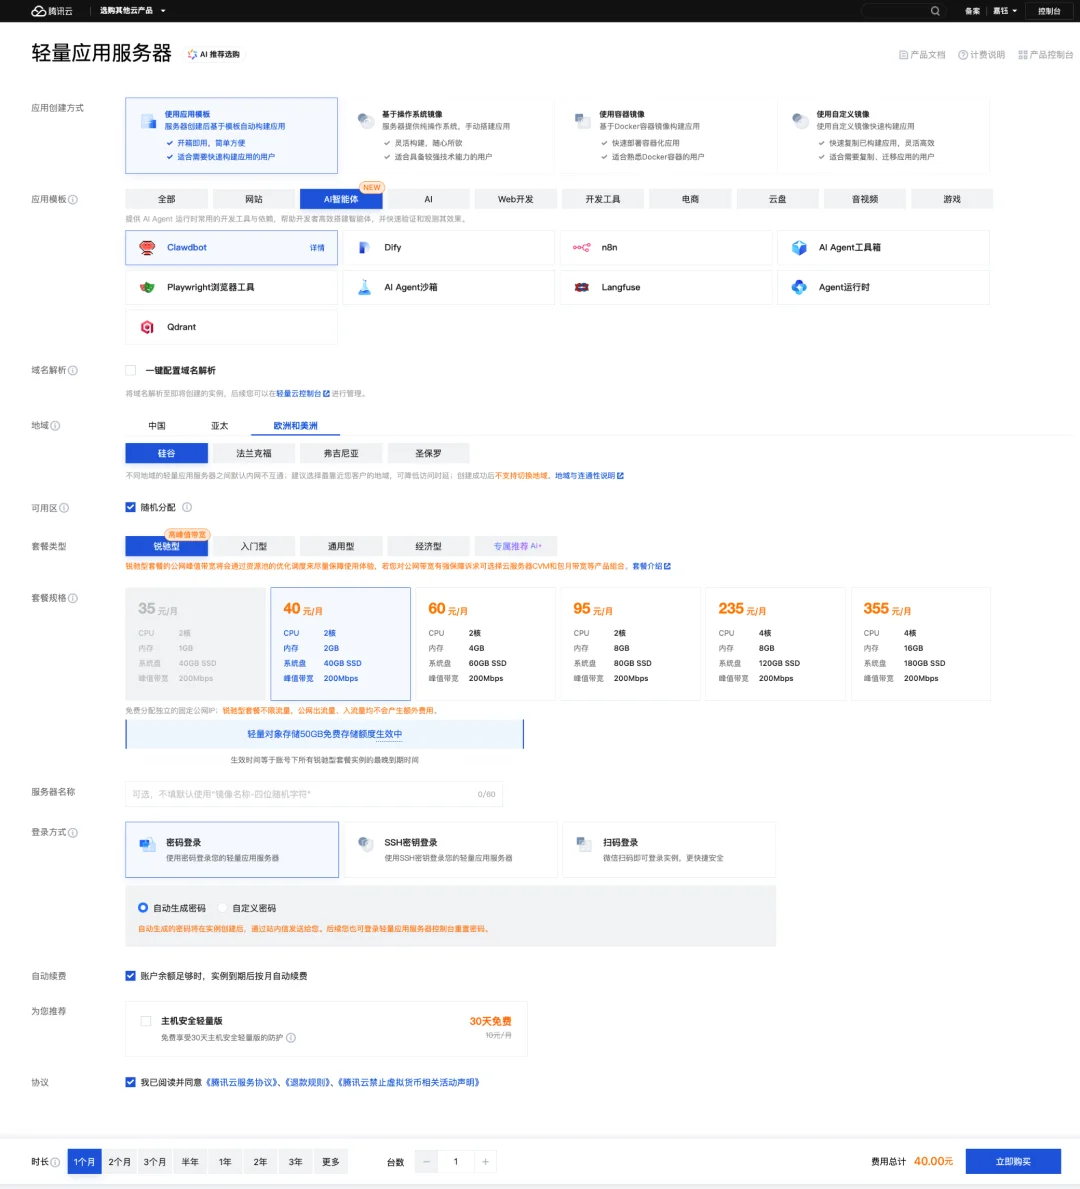
- Click “Buy Now” and complete checkout.
Option B: Repurpose an Idle Instance
- In the Lighthouse Console, locate an unused instance → click “⋯” → “Reinstall System”.
- In the reinstallation dialog:
- Select Application Templates → AI Agents → Clawdbot
- Set login credentials to “Configure after reinstall”
🔔 Note: The Clawdbot template is currently available only in Hong Kong and select overseas regions. It may not appear in mainland China zones.

- Enable “Backup before reinstall” to preserve critical data.
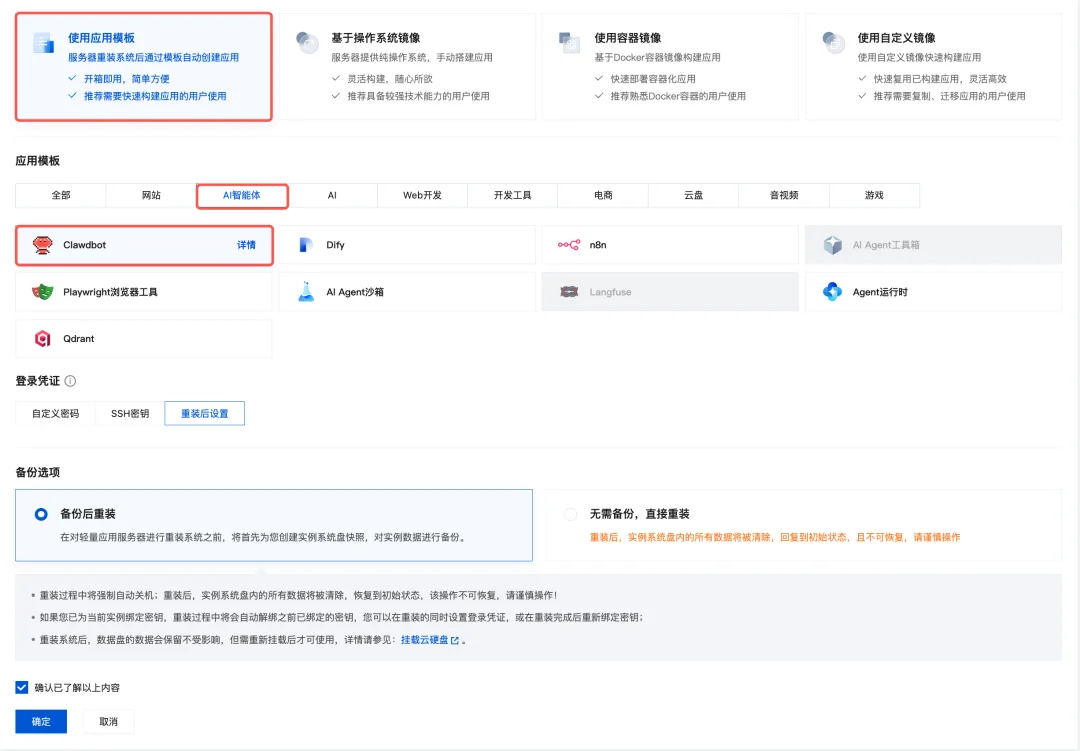
- Confirm and wait for completion.
✅ Step 2: Log In & Complete Onboarding
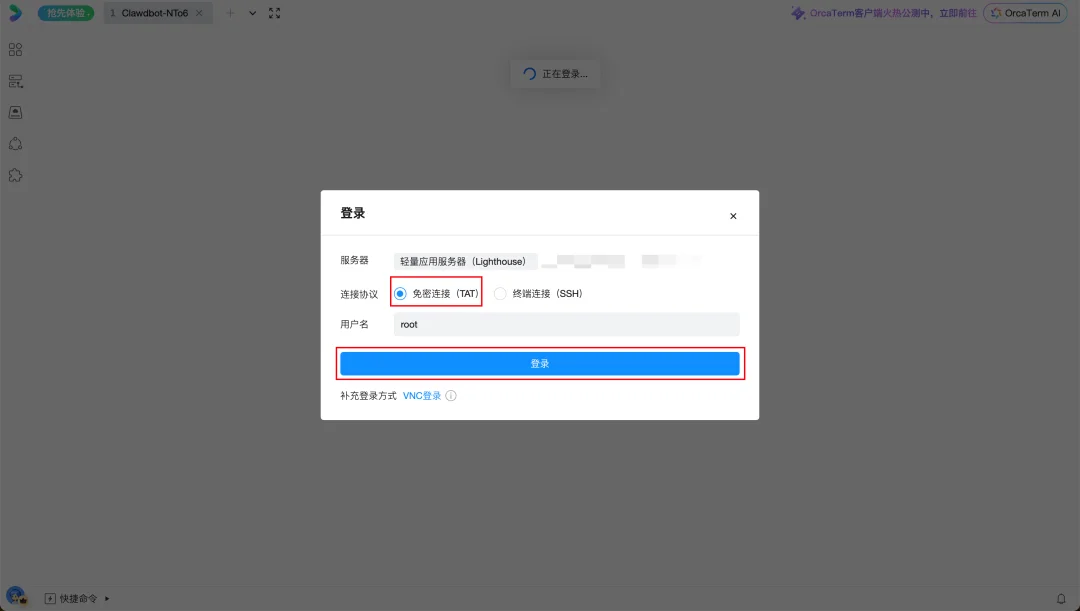
- In the Lighthouse Console, find your Clawdbot instance → click “Login”.
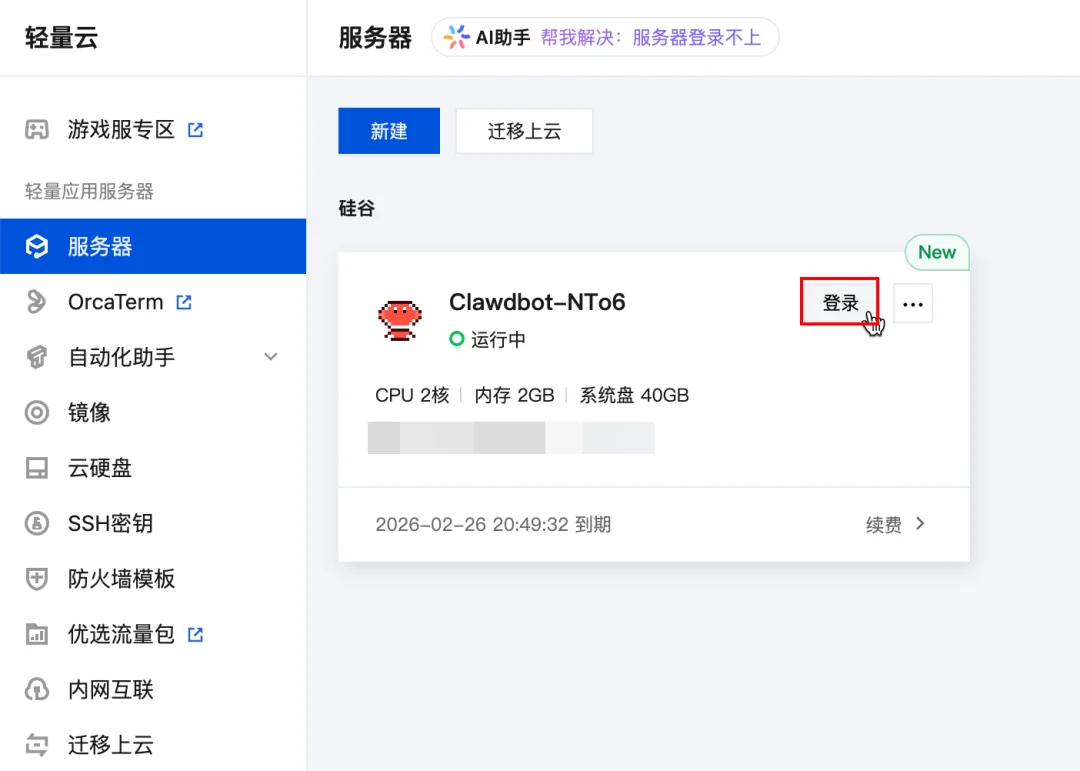
- Use OrcaTerm → select “Passwordless Login” → click “Log In”.
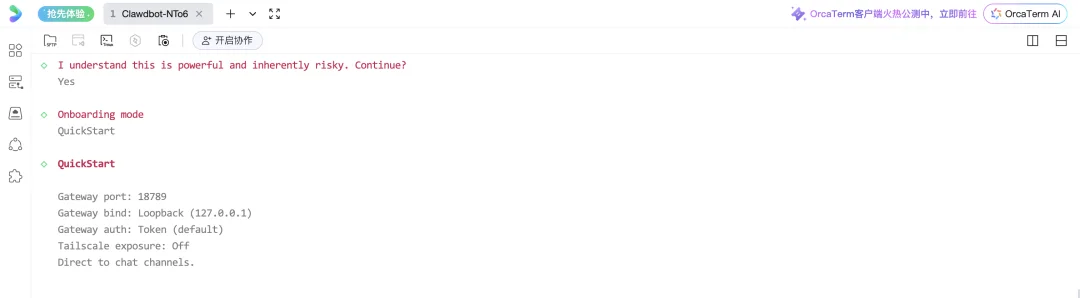
- Upon successful access, run the interactive setup command:
clawdbot onboard
Use arrow keys to navigate and Enter to confirm selections.
📌 Onboarding Steps:
Step 1: Accept Disclaimer
Confirm awareness of operational risks by selecting Yes.

Step 2: Choose QuickStart Mode
Select QuickStart for streamlined initialization.
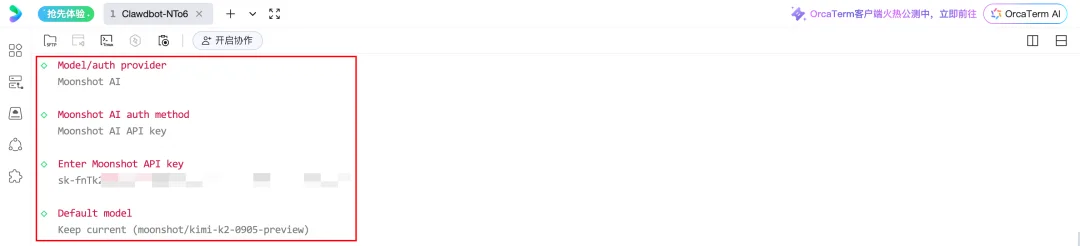
Step 3: Configure LLM Provider
Choose your preferred foundation model (e.g., Claude, OpenAI, Anthropic) and input your API key. Default settings can be retained via Keep current.
✅ Step 3: Connect Messaging Apps & Activate
After onboarding, configure chat integrations using Clawdbot’s official documentation:
👉 Clawdbot Official Setup Guide
Follow the guide to:
– Generate platform-specific bot tokens (Slack/Discord/Telegram)
– Bind your Clawdbot instance to target channels
– Execute startup command to launch your AI agent in real time
Welcome to Your Personal AI Era
With Tencent Cloud Lighthouse, you gain:
– ✅ A dedicated, secure, and scalable AI runtime environment
– ✅ Zero local hardware risk or performance overhead
– ✅ Full control over data, memory, and execution logic
Clawdbot goes far beyond chat—it reads/writes files, retains deep context, adapts workflows, and evolves with use. This isn’t just another bot. It’s your digital twin.
🚀 Get started today—and discover what your AI assistant can do for you.
Article originally published by Tencent Cloud Server team.