Codex Desktop Pet Tutorial: 3 Essentials to Get Started
Transform your AI workflow with a personalized, animated desktop companion that reacts intelligently to Codex task states.
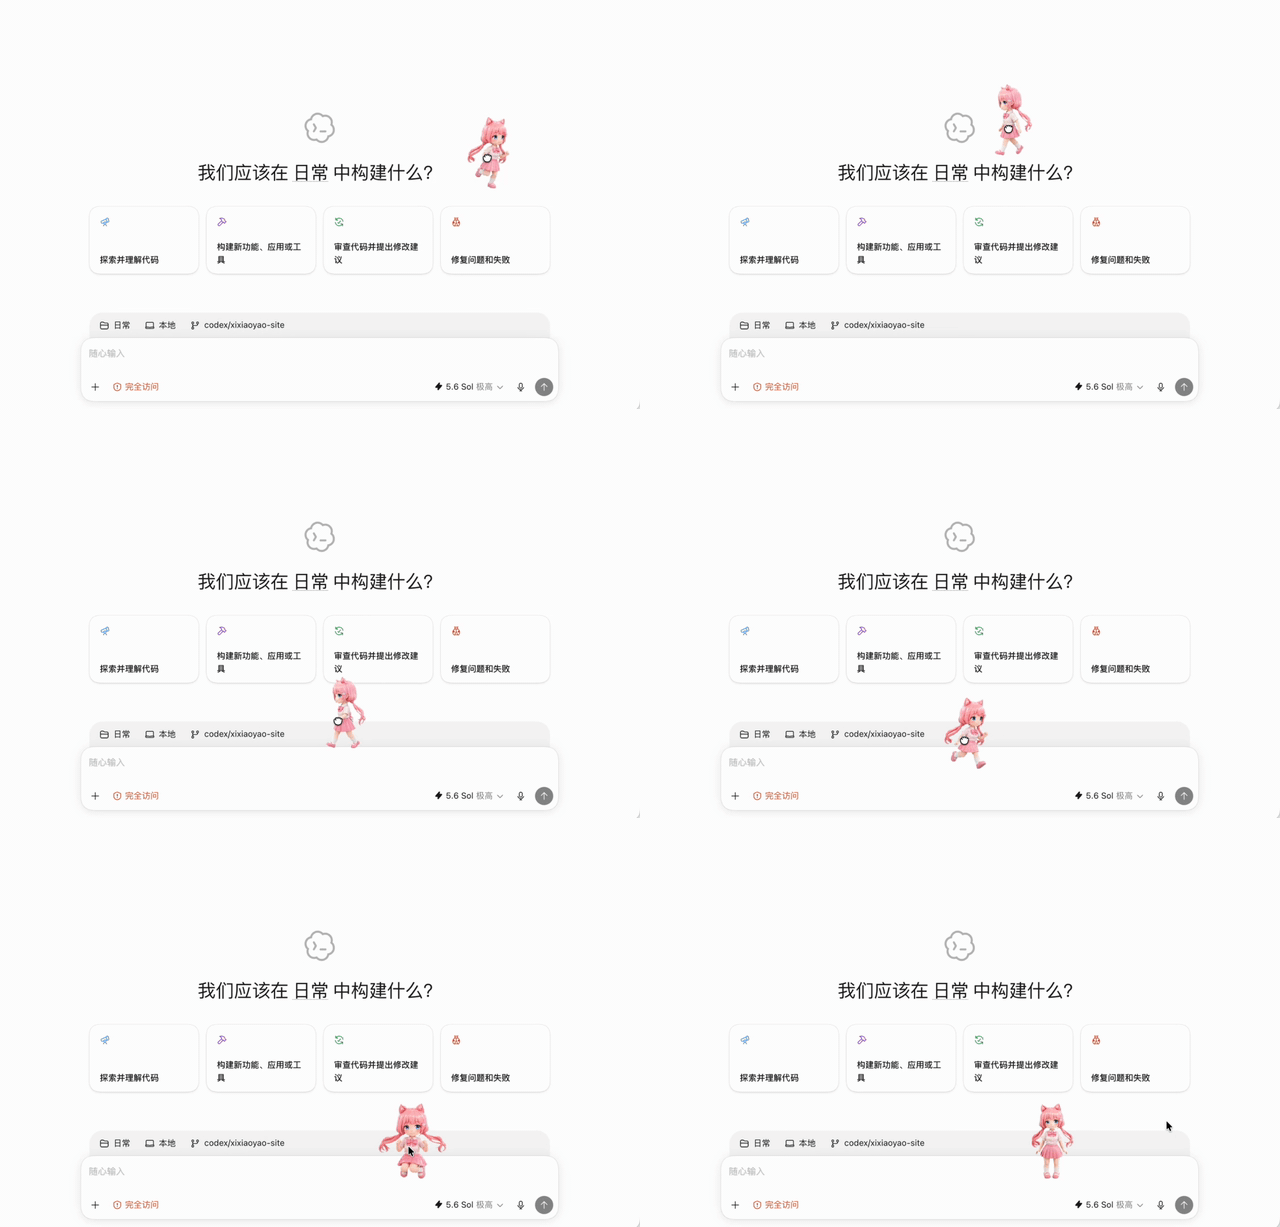
I recently built my own Codex desktop pet — and it’s far more than just eye candy. Using the Xiao Yao IP character (though you can use your photo, original artwork, or even your cat), this interactive companion dynamically mirrors Codex’s operational status — boosting context awareness without cluttering your UI.
How It Works: Beyond Static Icons
Unlike conventional status indicators, your desktop pet delivers intuitive visual feedback:
- 🚀 Working state: Animated “busy” motion while Codex processes tasks
- ⏸️ Awaiting input: Pauses gracefully when user confirmation is required
- ❌ Failure or validation phase: Distinctive idle, error, or checking animations
While quantifiable productivity gains vary, the immediate situational awareness — versus scanning raw status text — is universally impactful.
✅ Prerequisites: Just 3 Things
Before launching Hatch Pet, ensure you have:
- A functional Codex app (v2.0+ recommended)
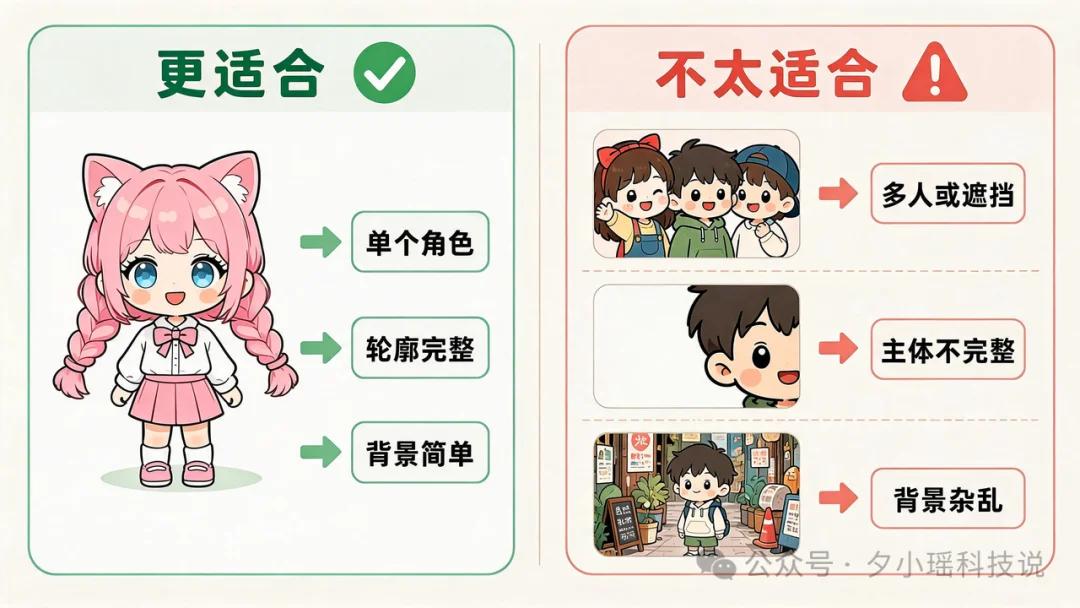
- A clean reference image — single subject, clear silhouette, simple background (front/slight profile preferred)
- Sufficient generation quota & time — expect ~1 hour runtime and ~60% of weekly token allowance
💡 Pro tip: Avoid intricate patterns, fine jewelry, or text in source images — they’ll blur at small UI scale. Prioritize clarity over detail.
🛠️ Step-by-Step Implementation
1. Install Hatch Pet Skill
Hatch Pet is a curated OpenAI Skill. Install it via Codex command line:
$skill-installer hatch-pet
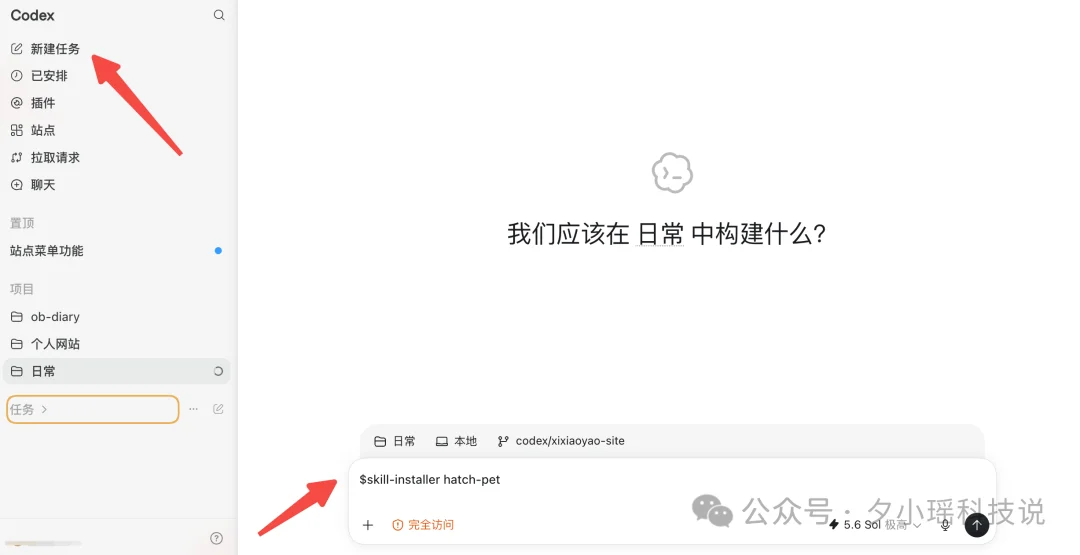
→ Restart Codex to load the skill. Verify with:
“Can you use hatch-pet now?”
2. Understand the Pipeline
Hatch Pet functions as an end-to-end pet factory, not just a prompt engine:
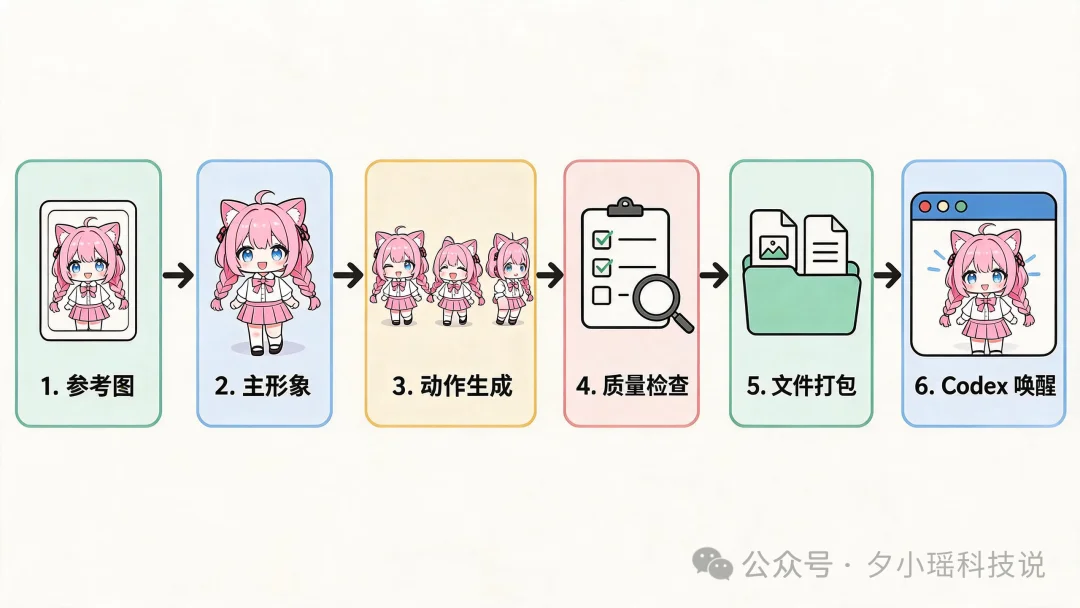
- Input: Your reference image + style guidance (Q-style, pixel art, clay, flat illustration, etc.)
- Output: 8+ synchronized animations (idle, walk left/right, wave, jump, fail, wait, run, check) + 16 viewing angles (upcoming)
- QA Layer: Auto-checks for consistency, frame integrity, and transparent backgrounds
- Packaging: Generates
pet.json(metadata/config) andspritesheet.webp(animation atlas)
3. Generate Core Character First
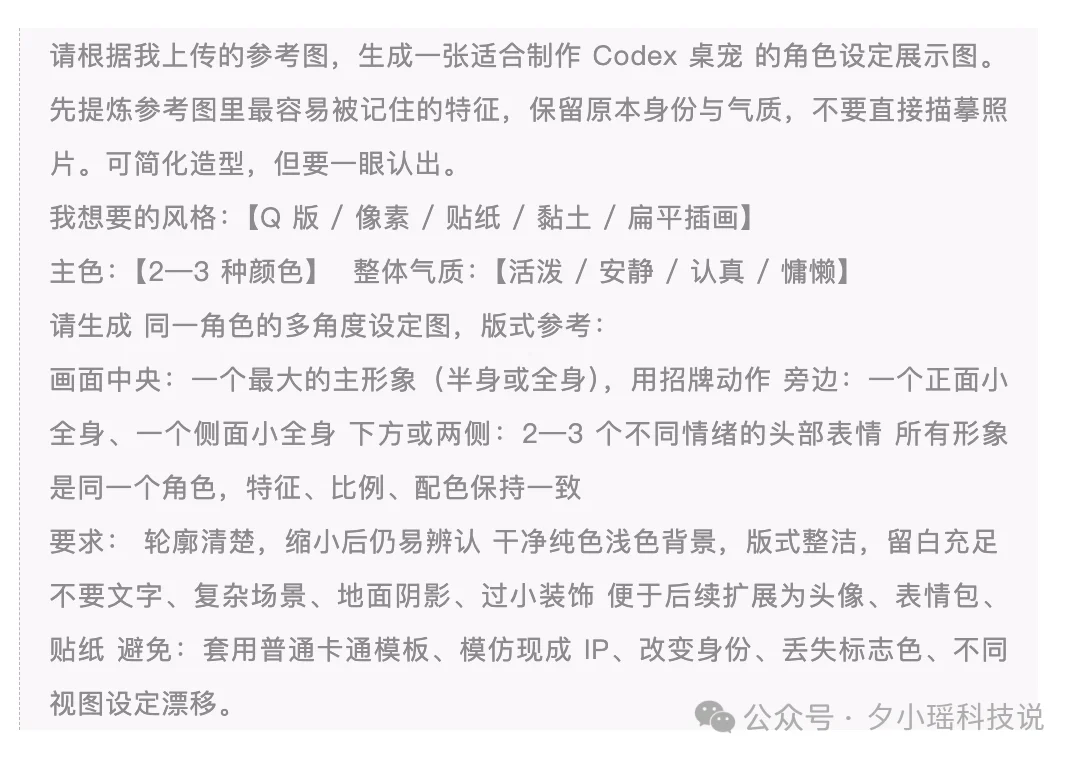
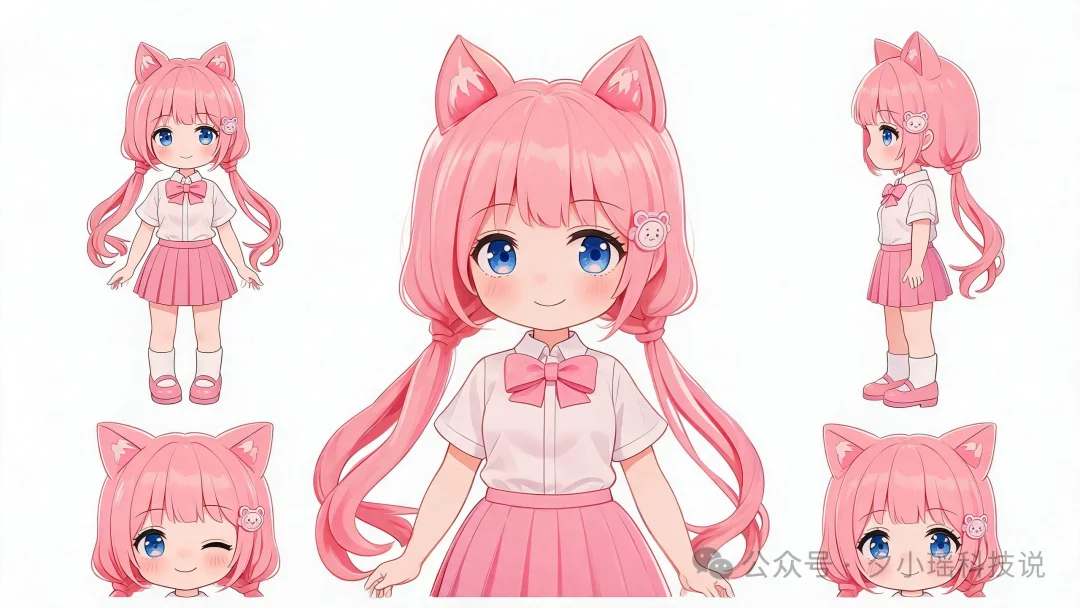
Start with a static master image — don’t skip this. Upload your source and specify desired style:
“Convert this into a friendly Q-style desktop pet. Keep facial features and core colors recognizable at 64×64px.”
✅ Validate:
– Faithful likeness to original subject
– Legibility at thumbnail size
– Aesthetic alignment with your workspace
4. Feed to Hatch Pet
Upload your finalized character image and use this structured prompt:
Please use $hatch-pet to convert my uploaded image into a Codex desktop pet.
Pet name: [Your Pet Name]
Guidelines:
- Preserve face, proportions, primary palette, and signature traits across all poses
- First confirm main identity → then generate full pose set → perform visual QA → package & install
Hatch Pet executes four sequential phases:
| Phase | Purpose |
|---|---|
| Getting ready | Validates name, description, reference, and style |
| Imagining main look | Locks canonical appearance (basis for all animations) |
| Picturing poses | Generates 8+ consistent action frames |
| Hatching | Assembles sprite sheet, runs QA, fixes artifacts, packages files |
⏱️ Patience is key: Pose generation is computationally intensive. Watch the progress log — if updates continue, avoid restarting.
5. Review Before Installation
Never deploy blindly. Audit these five criteria first:
- 🔍 Consistency: All poses reflect the same character identity
- 👁️ Clarity: Key features remain discernible at desktop scale
- 🔄 Smoothness: Idle/walk loops animate fluidly
- 🎯 State accuracy: Run/wait/fail/check animations are distinct & context-appropriate
- 🧼 Clean background: Zero residual edges, halos, or opaque zones
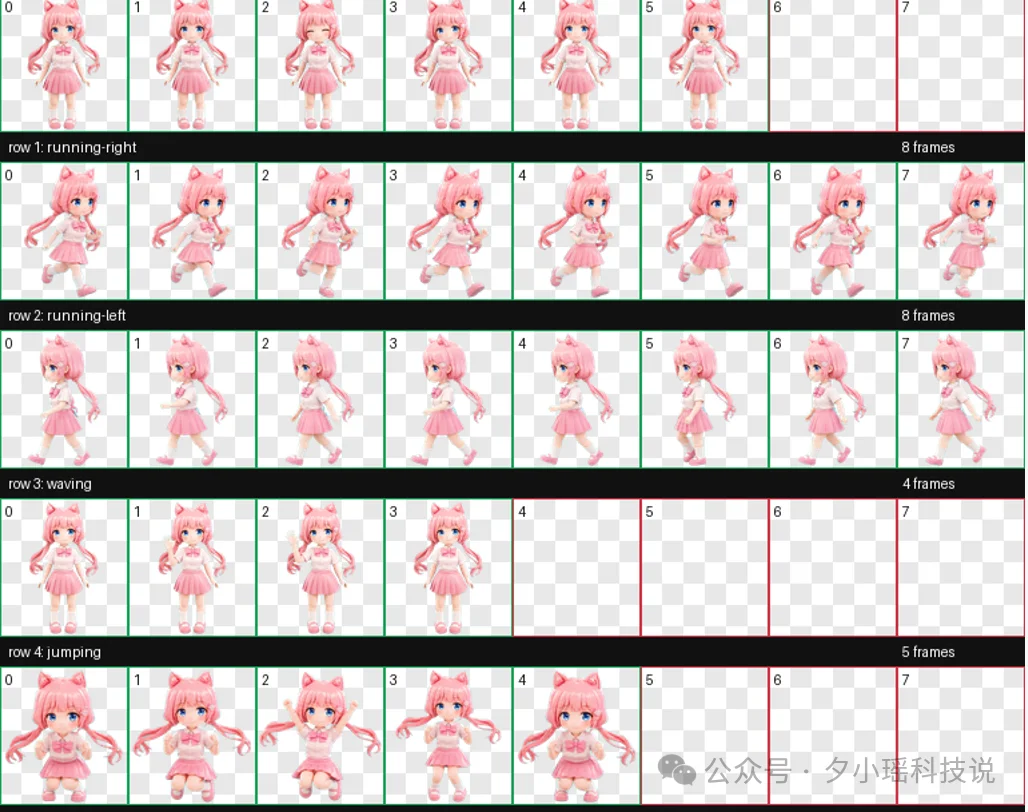
If only one animation fails, refine specifically:
“The ‘waiting’ pose shows inconsistent hair styling vs. main identity. Retain all other validated poses; regenerate only the waiting frame using the original master image.”
6. Install & Activate
Hatch Pet saves outputs to:
~/.codex/pets/[Your Pet Name]/
├── pet.json
└── spritesheet.webp
→ Navigate to Codex Pet Settings > Custom Pets, select your folder, and click Wake Up.
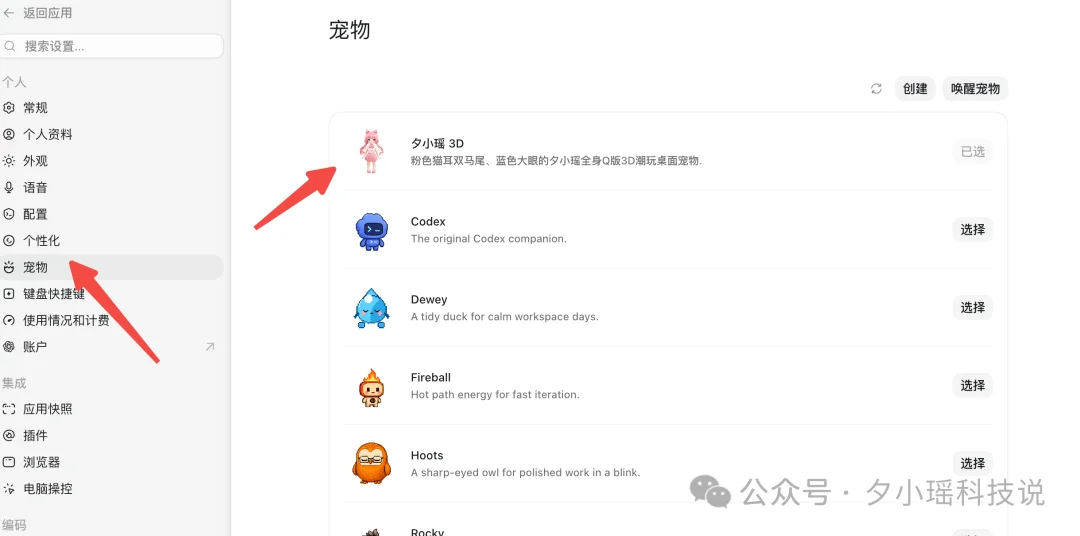
💡 Troubleshooting: If changes don’t appear, toggle pets or restart Codex.
7. Test Live Workflow
Installation ≠ completion. Validate with real tasks:
“Process this meeting transcript into minutes, listing owners, deadlines, and pending items.”
Observe:
– Does it enter run mode immediately?
– Does it pause when awaiting your input?
– Do failure/check states trigger unique animations?
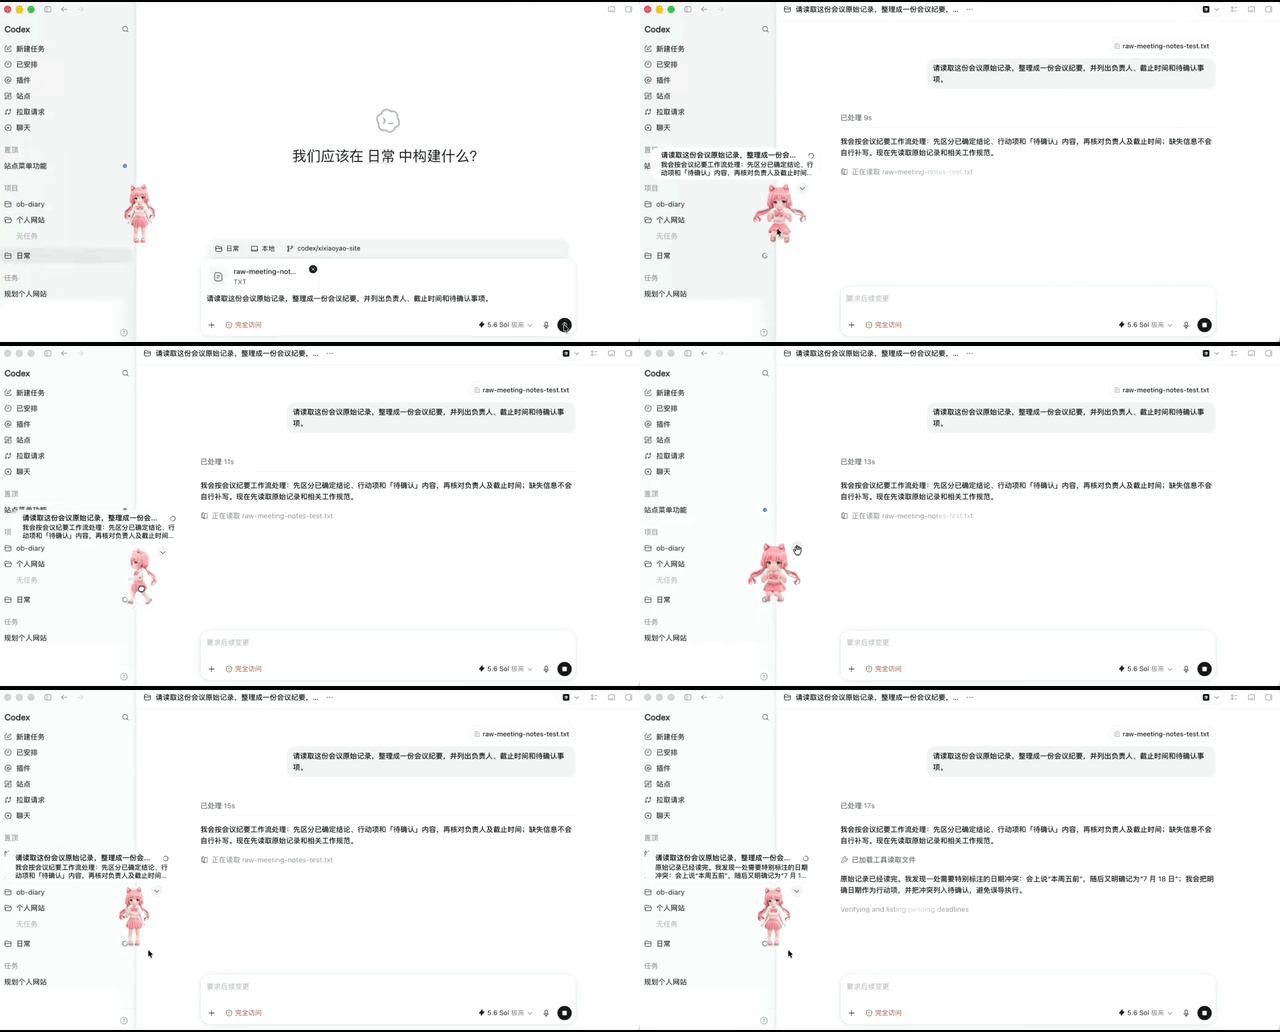
✅ Success = seamless state synchronization — not just visual polish.
🌟 Pro Tips for Iteration
- Start minimal: One solid reference + core poses > perfection on all 16 angles
- Iterate incrementally: Deploy first version, then enhance expressions/movements based on actual usage patterns
- Leverage Hatch Pet’s self-correction: Describe flaws precisely (“left arm clipping in jump pose”) instead of full regeneration
You’ve navigated setup, generation, QA, installation, and live testing. That’s the hardest part done. Now — who’s joining your desktop?
Article originally published by “Xi Xiao Yao Tech Talk”, author “Aya”.